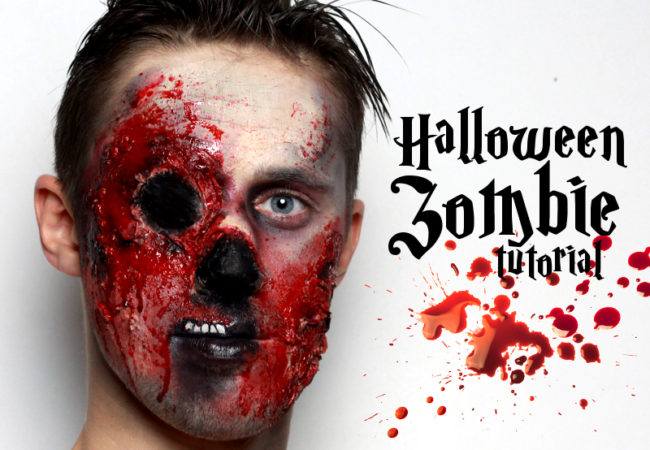
Halloween is the perfect excuse to go a little overboard with makeup and learn a few tricks from the special effect and stage makeup industry.
Here’s how to do a Halloween zombie makeup with gory fake wounds and lots of blood inspired by the TV show everyone’s talking about, ‘The Walking Dead‘.
What you’ll need:liquid latex, tissue paper, piece of cloth or paper candy cup, oat bran, foundation, face powder, liquid eye liner, face painting palette, fake blood
Zombie Makeup: Prep the Base
Stretch the skin on the forehead and apply a thin layer of liquid latex using a cheap medium sized brush. Refrain from using your makeup brushes to apply latex as it will destroy them. Speed up drying time by blasting the latex with your blow dryer on the lowest setting until it turns transparent. The effect we are going for is dry, wrinkled skin.
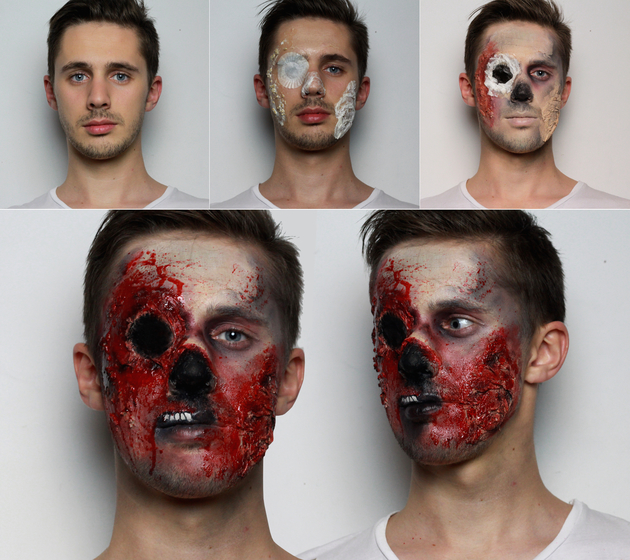
Use a small piece of cloth or paper to cover the eye which we will carve out. We’ve used a small paper bonbon cup, but any paintable material will do. Use latex to seal the paper concentrating on the edges. Dry it with the hair dryer, then follow with a light face powder to mimic the texture of skin.
Start building a wound by applying a thin layer of latex. Then add more texture with a mixture latex and oat bran. Seal everything with another layer of liquid latex.
Move onto the nose and apply a small piece of tissue paper over liquid latex and wrinkle it to make it look like dead, torn skin. Seal the edges with latex to blend well into the skin.
Create another wound on the other side of the face using the tissue paper technique and dry with the blow dryer. Apply face powder to the wounds that will give the latex more stickiness.

Zombie Makeup: Start Painting
Use a special face painting palette and start coloring the face. Mix foundation with white and green paint until you get the color of pale, dead skin. Add dark circles around the eyes with a purple color, then give more depth with black. Contour the face and fill in the tip of the nose and eye socket with the black paint, then give the entire face a dusty look.
Use red paint to start coloring the wounds. To give the cut out eye a more realistic depth, add a layer of latex around the eye with tissue paper and create the illusion of hanging skin.
Add foundation as a base for the colors you’re going to use and continue with the detailing of the wounds. Use a darker red to deepen the wounds and intensify the shadows of the hanging pieces of skin.
Add a creamy white paint to the upper lip as a base for the teeth. Start drawing on the teeth with a liquid liner and a thin brush. Apply more black paint to the new mouth and connect it to the rest of the wounds with red. Create more shadows where needed. Apply a new layer of latex and tissue paper to the nose. Highlight the skin right next to the wound with a light foundation, following with red paint to give it a fleshy look.
Zombie Makeup: Finishing Touch
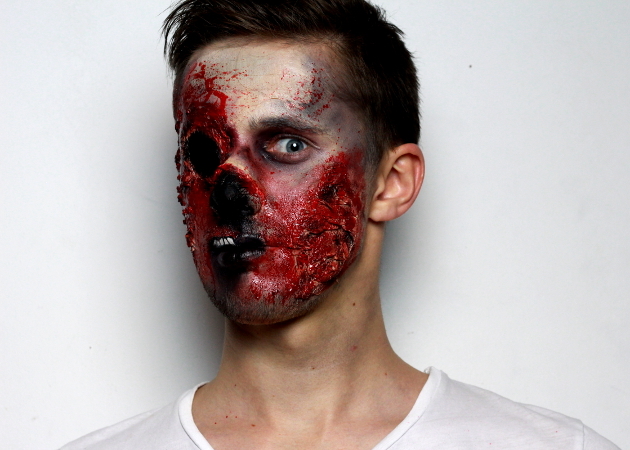
No zombie makeup is complete without lots of fake blood: first apply where blood would coagulate first, then splash more to get a dripping, splatter effect. Go back to the nose and add more blood using a brush. Finish the zombie look by dirtying up the hair with gel or mousse.
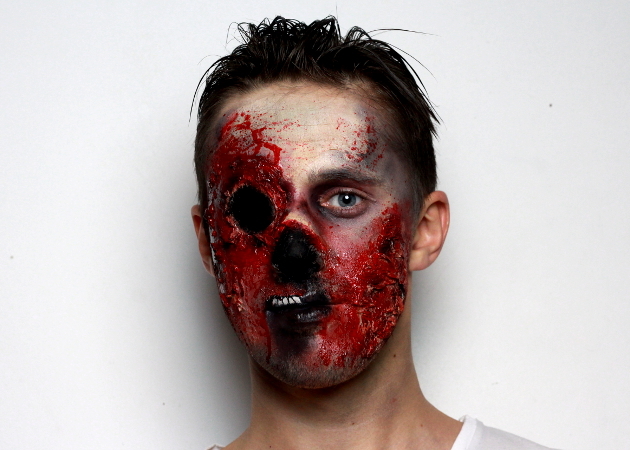
Makeup by Deea Bălgărădean for BecomeGorgeous.com
More Halloween makeup ideas:Sugar Skull Makeup for HalloweenVampire Makeup Ideas